Feeds:
Posts
Comments

Archive for the ‘Uncategorized’ Category

If you follow my blog don’t expect consistency! I can bounce from project to project in an hours time. This morning I am stepping aside from the woodworking and gardening projects to start a backyard bird blog.

Like the other posts I have, this one will be updated as new birds show up and I get better pictures of the regulars. Let me start out with some geography.

I live in southeastern Wisconsin, about 10 miles from Lake Michigan. I live on a dead end road with an 800 foot driveway. I cannot see my neighbors and they can’t see me! I am basically surrounded by farm fields and a 20 acre woodlot is the backyard. I don’t own all of it, or even most of it…just enough of it.

My family and I are not total expert bird watchers, so don’t send me pictures of birds asking for ID help. I’ll probably be asking for your help in that department. I’m also far from a great photographer. Again, this is for fun and relaxation.

I have two “stations” that we offer feed for the birds. The one in the backyard (woods) is just a suet feeder that attracts woodpeckers and nuthatches. It also attracts the chickens who feed on the suet that the birds drop. Nothing is wasted in nature.

The station in the front yard is another suet feeder and some sock feeders filled will Niger Thistle seed. We usually see a lot of finches at the socks.

That’s the basic info. What else do we see? We will also see Robins, Cardinals, Chickadees, Sparrows, and a bunch of birds that I haven’t ID’ed yet.

Birds that we see sometimes as they pass through our area are Evening Grosbeaks (I really like them), Baltimore Orioles, and Wood ducks will nest in the woods if we get enough rain/snow melt to fill up the low spot.

Let’s see, oh and the best…Blue Birds. We put up some simple houses on a couple of the goat pasture fences and the bluebirds will use them to raise a brood each year.

We get our share of the birds of prey as well. A Great Horned Owl
sat in a tree in the front yard a couple of weeks ago. Something must have disturbed it since it was about 10:00 a.m. We also see some hawks, red tailed I think.

Because of our close proximity to Lake Michigan and several large marshes we have lots of ducks and geese around as well. Hopefully in fall I can show some harvest pictures. Speaking of hunting, I almost forgot the Mourning Doves and Turkeys! They taste great!
So enough of that, I’ll add some pictures and try to keep it organized. Maybe. I don’t enough about WordPress to know if you can post pictures if you leave a comment, but If you can please do!

Another bird that I forgot is the Bald Eagle. Actually we don’t see them often at all around home. Where we go camping and fishing up north we see them. Here is one that was about a mile from the house and we were pretty far away from it, but you can tell what it is.

Mourning Dove

I believe this is a White Crowned Sparrow

Gold Finch

Baltimore Oriole

Not the best picture, but we do also see some humming birds. I think they are the ruby throated variety.

If anyone can ID this one I would appreciate it. It is an insect eater. I watched it hover and swoop down on something several times. Only saw it one time.

Cardinal

Eastern Bluebird

A pair of them.

A goose family picture. Or would it be a picture of geese?

I like Bluebirds.

I think this is some kind of heron. Farmers despise them! I don’t know if they eat the freshly planted seeds but the farmers think they do. Either way, they are protected and everywhere in Spring.

Barn Swallows


Evening Grosbeak

Wow, this is a big project! I’ll come back and add more later.

Here are some resident Woodpeckers.

A red headed one.


I think this is a male downy

One more time…

Read Full Post »

This blog will be an ongoing diary of my lettuce plantings this spring. I always start off the gardening season with a notebook and the intention to document everything I do in the garden. The intentions fade quickly though and eventually nothing gets recorded. I’m hoping that by using this blog I will stick with it longer.

So here starts the lettuce diary!

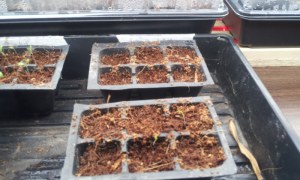
2-8-2012 Me and the kids started 6 varieties of lettuce. These seeds are leftovers from last year. I don’t know how viable they are and since it is just lettuce I am not going to worry about doing a germination test or anything like that.

The six varieties are Simpson Elite, Royal Red, Parris Island, Salad Bowl, and Red Fire. They are planted in Burpee brand  seed starting pellets and coconut fiber. The flat was placed on an east facing windowsill and we had some germination in a couple of days.

A side note is that after we planted the lettuce I decided to build a light stand and heat mat. Once that was complete the lettuce was moved to a the light stand, but no heating mat. I believe that was done on the 16th of February.

2-18-2012 Pictures of lettuce today. I discarded the Salad Bowl tray because there was no sign of life.

Back Left = Black Seeded Simpson, Front Left = Simpson Elite, Back Right = Red Fire, Front Right = Salad Bowl (Discarded)

Back Right = Parris Island, Front left = Royal Red

The lettuce seedlings had some white furry stuff on the stalk. It seems like they grow out of it??? I say that because the taller it gets, the less of the white stuff there is. Does anyone know what it is? The soil is a little wetter than I would like and I am currently working on getting it dried out some. I think that is the problem.

2-20-2012 The white stuff appears to be gone. But for some reason two seedlings fell over. They didn’t shrivel up …yet so I’ll wait to pull them. I’m wondering if I have too much light for them. I turn the lights on for about 12 hours each day. I’ll have to research that and find out what the optimal light time is.

The picture below is the Parris Island that did not germinate. Remember this is last years seed. I restarted a new tray with this years seed for Parris Island.

Below is the new tray of Parris Island, a Romaine type.

Instead of continuing this post any new updates will have their own post. Here is the next update.

Read Full Post »

While out in the garage today I was fussing about the mess that all the boots and shoes make. If you came in our garage and looked at the number of boots laying around you would think 20 people lived here!

But, in fairness the boots all get used. We all need to have a pair of rubber boots for the barn. We all need a pair of winter boots to just go outside. We all need a pair of tennis shoes for running into town. And finally most of us have a pair of work boots.

While thinking about an idea to organize the boots my youngest son came out and I included him in the thought process. We both had different ideas and with enough discussion we came up with what I think will work great.

The pictures tell the story better than I can so I will just add some to this post. The brown shelf that is next to the boots now is we have been using to keep boots on. It works, but because of the flat shelves it can get pretty messy. We will still use it for tennis shoes and clean boots until I am convinced that the new rack will work. If it does, I will take out the brown shelf and extend the rack.

Let me know what you think. If anyone is interesting in making their own let me know how it turns out.


There is really no vertical support. The support comes from the end pieces. If you look at my post about basement shelves I give more info about them. Those winter boots are sized 12-14 and heavy. You can see that the span of 6 feet does not sag at all.


Read Full Post »

I like shelves. I like to use them and I like to build them. Nothing fancy, just useable inexpensive shelves. I recently made three different shelving units for our basement. Two of them are pretty much my standby design, and one of them is pretty advanced for me.

The first pictures show my basic design. I usually use 1/2″ to 3/4″ OSB. It is inexpensive and plenty strong for my needs. I then use either 2 x 4’s or 2 x 2’s to build a frame. This becomes a shelf. Simply build as many as you need and then screw them to the vertical posts. Again, usually a 2 x 4. One of these shelves was recycled from a past shelf project. That’s why you might notice 2 x 2’s and 2 x 4’s mixed.

It’s a pretty simple way of making shelving where looks aren’t critical. They don’t look bad, just unfinished. Usually when I make shelves I know ahead of time what I need to store on them. I simply measure the tallest item, allowing for the shelf thickness and put it together. This shelf is 8 feet long. I still need to add a vertical post in the center of the 8 foot length. You can see in the top picture that the center post is missing.

One thing to keep in mind with this style of shelf is that you might have to have someone help you fit it together. It can be tricky trying to attach the shelves to the vertical posts.

I will quickly give you the steps that I go through when assembling one of these. Let’s say I will have four shelves that are 14″ deep and 8′ long. I make the four shelves and lay them on top of each other wherever the shelves will be installed. Then I take the vertical posts that go in the back, or against a wall and put them in place. Now you will need someone to help you lift the top shelf all the way up to the top where it will get screwed in to place. If you didn’t mark that spot on your vertical posts, set the shelf back down, go find a tape measure and do it. Once you get that top one done, just raise the next one, repeat until they are all in place. Easier said than done, I know. Having a few kids around will help 🙂

One quick note. I recently noticed that Home Depot carries a 2 x 3 board. Just like a 2 x 4 but a little smaller. In my opinion this is a perfect size for these shelves. I believe the cost is about $1.55.

Here is one more shelf unit like the one above except I notched out the shelf to accept the vertical posts. Basically the same shelf but the vertical posts are inline with the shelf and nothing sticks out. There is actually a narrow aisle here so I wanted to save as much space as I could.

One other thing I did on this shelf is to fasten it to the cinder block wall behind it. I don’t think I would have to attach it, but I had some tap con screws left over from a different project so I did. These shelves are very stable if you are not “leveling” challenged like I can be at times. They are also strong enough that kids may want to climb on them.

That gets me to my newest design. I found this online while searching for some new shelf ideas. This shelf is very inexpensive and really easy to make. It uses 1 x 4 furring strips that you can get at Home Depot. I believe they cost about $1.50 each. The only other board is a small piece of 2 x 2.

I think it looks pretty nice and they are very strong.

I use this shelf for keeping things that should be in the garage but I don’t want to freeze. Although this year you never know if it will freeze!

This is a picture of the most critical part. From the bottom looking up. I’ll link to the source below this and let him tell you how to do it. Let me just say that it’s easy and not as critical as he makes it look.

Let me know if you find any shelving ideas. I like these kinds of projects. Leave a comment!

Here is a link to the original source for this shelf.

http://woodgears.ca/shelves/garage.html

Read Full Post »

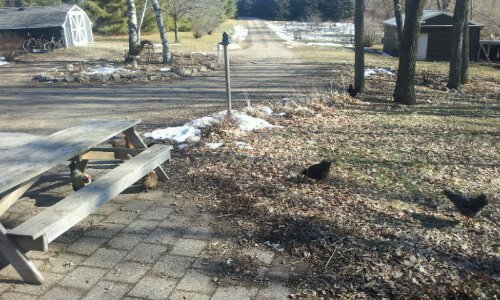
It’s not very often that south eastern Wisconsin has very little snow on Feb. 4th. The sun is shining and the chickens are foraging.

image

Read Full Post »

Ermine

My son got his first ermine the other day. For those of you that don’t know a weasel in winter with it’s white coat is called an ermine. In summer when they have there brown color, they are called a weasel. Neat.

Read Full Post »

This is something that has always interested me. I have been finding some how to’s on the subject and am planning on trying it out this year. Let me know if you have done this and what your results were. Also, what did you use it for?

Here is a link to a pretty specific set of instructions.

http://www.motherearthnews.com/Do-It-Yourself/1983-01-01/Making-Natural-Cordage.aspx

Read Full Post »

Older Posts »